Pro tip: Book your parking online early to get the best deals. This way, you also ensure parking during busy times.
Terminal 1 Parking Options
Dublin Airport has many parking options for Terminal 1 users. Choosing the right parking can make your trip better. Terminal 1 offers various parking choices to fit your needs.
Short Term Block A: Convenient Proximity
Short Term Block A at Terminal 1 is very convenient. It has:
450 available parking spaces
Closest short-term parking to both Terminal 1 and Terminal 2
Minimal walking distance from parking area to terminals
Short Term Block C: Spacious Parking Solution
Block C is a great choice for short-term parking at Dublin Airport. It offers:
1,500 total parking spaces
Only 5-6 minute walk to terminals
Convenient location for quick airport access
T1 Drop & Go Service: Streamlined Airport Experience
The T1 Drop & Go service makes parking easy. It has:
Online booking available up to 12 hours before arrival
Located on Level 2 of Terminal 1's Car Park C
Efficient drop-off option for time-sensitive travelers
Picking the right parking can make your airport trip smoother and more relaxed.
Terminal 2 Car Park Solutions
Travelers flying from Terminal 2 at Dublin Airport have many parking options. These options are designed to make their airport experience easier. They ensure parking is both comfortable and efficient.
The T2 car park Dublin Airport has a large short-term parking area. It has features that make parking at the airport easy:
1,800 dedicated parking spaces
Sheltered walkway (2-4 minutes to terminal)
Easy access for passengers
Terminal 2 parking offers two main options for travelers:
Short-Term Parking: Located right next to the terminal, great for short stays
Drop & Go Service: Ideal for quick drop-offs
The Drop & Go service at the T2 car park Dublin Airport lets passengers book up to 12 hours in advance. It's located on Level 3 of the Terminal 2 Short Term Car Park. This option is perfect for travelers who are short on time.
"Efficient parking solutions make your travel smoother and more enjoyable" - Dublin Airport Parking Services
Passengers will find well-marked zones and clear signs at Terminal 2 parking. The parking process is streamlined. This makes parking at Terminal 2 easy and convenient.
Long-Term Parking at Dublin Airport
Travelers looking for long-term parking at Dublin Airport have many great options. These airport long-term car parks offer flexible solutions for extended trips. They ensure secure and easy parking near both terminals.
Dublin Airport has three main long-term parking choices. Each one meets different needs and budgets. This makes it easy for passengers to find the best parking solution.
Express Red Long Term
The Express Red Long Term car park is the closest to terminals 1 and 2. It offers:
8,000 available parking spaces
5-minute shuttle service to both terminals
Convenient proximity to airport entrances
Enhanced security monitoring
Holiday Blue Long Term
The Holiday Blue Long Term parking is great for those watching their budget. It provides:
8,000 parking spaces available
15-minute shuttle service to terminals
Competitive pricing
Ideal for extended trips
T2 Surface Long Term
The T2 Surface Long Term offers a compact parking solution. It has direct terminal access:
270 dedicated parking spaces
Only a 5-minute walk to terminals
Perfect for shorter trips
Convenient location near Terminal 2
Parking Option
Spaces
Shuttle/Walking Time
Best For
Express Red
8,000
5-minute shuttle
Quick terminal access
Holiday Blue
8,000
15-minute shuttle
Budget travelers
T2 Surface
270
5-minute walk
Short trips
Pro tip: Book your long-term parking in advance to secure the best rates and guarantee your parking space at Dublin Airport.
Drop & Go Premium Services
Travelers looking for the best at Dublin Airport now have Drop & Go parking. It's a new way to park that saves time and reduces stress. It's perfect for those who are always on the go.
The service makes getting to your flight easy. Just drop off your car at the designated area. Then, hand over your keys to the staff and head to your terminal. No need to worry about parking.
Convenient key handover at dedicated locations
Professional valet parking management
Reduced stress during airport departure
Rapid processing for time-sensitive travelers
Premium parking at Dublin Airport is close to Terminals 1 and 2. It's easy to get to for everyone. The service also takes care of your car and keeps it safe.
"Your journey starts the moment you arrive – let us handle the parking while you focus on your travel."
Service Feature
Details
Location Coverage
Terminal 1 and Terminal 2
Processing Time
Less than 5 minutes
Vehicle Security
24/7 monitored parking facility
You can book Drop & Go parking online. Choose your time and get a spot when you arrive. It's that simple.
Short-Term Parking Rates and Fees
Finding the right parking at Dublin Airport can be tricky. But knowing the short-term parking costs helps you plan better. There are many parking options to suit your budget and time needs.
Hourly and Daily Rate Structure
Dublin Airport's short-term parking fees are easy to understand. They offer flexible choices for travelers:
First hour: €3.00
Each additional hour: €6.00
Maximum daily rate: €45.00
Pre-booking Advantages
Booking parking in advance can save you money. Online reservations come with big benefits:
Lower parking rates than walk-up prices
A guaranteed parking spot during busy times
The freedom to pick your parking zone
Booking Type
Average Savings
Recommended For
Walk-up Parking
Standard Rates
Spontaneous Travel
Online Pre-booking
Up to 20% Discount
Planned Trips
Pro tip: Book online in advance to get the best Dublin Airport parking rates. This way, you avoid availability problems during busy times.
Accessibility and Reduced Mobility Parking
Dublin Airport makes travel easier for everyone by offering great parking for those with reduced mobility. There are over 90 accessible parking bays near both terminals. This makes getting to your flight much easier.
These parking spots are designed for different mobility needs. They are placed in key areas to help reduce travel problems:
Terminal 1 Short Term Car Park B
Terminal 2 Short Term Car Park
Express Red Long Term Car Park
Travelers with reduced mobility will find these spots close to shuttle bus stops. This makes getting to the airport terminals smooth and easy.
Parking Location
Accessible Spaces
Proximity to Terminal
T1 Short Term Car Park B
30 spaces
Immediate terminal access
T2 Short Term Car Park
25 spaces
Direct terminal connection
Express Red Long Term
35 spaces
Free shuttle service
Pro tip: It's a good idea to talk to airport staff before you go. This way, you can make sure you get the right parking for your needs.
Online Booking and Reservation System
Finding parking at Dublin Airport is now super easy with our online system. You can book your parking spot fast and easy on our digital platform.
Our online booking system has many benefits for travelers. It offers:
Instant confirmation of parking spaces
Real-time availability updates
Flexible booking options
Secure payment methods
Discount Codes and Special Offers
Get big savings on your Dublin Airport parking with our special deals. Our seasonal discounts help you save money.
Check out our current offers:
SUMMER25: 15% off summer parking rates
Early bird discounts for advance bookings
Midweek parking specials
Advance Booking Benefits
Booking your parking online early has many advantages. It ensures you have a spot and can often get a better price than last-minute bookings.
Here are the main benefits of booking early:
Lower pricing for early reservations
Guaranteed parking availability
Reduced stress during travel preparation
Flexible cancellation options
Our pricing changes to give you the best deals when you book early. The sooner you book, the more you save on parking at Dublin Airport.
Park and Ride Services Near Dublin Airport
Travelers looking for easy off-site airport parking have great choices near Dublin Airport. These services are a smart choice over traditional parking. They offer flexibility and peace of mind.
PARK2TRAVEL is a top pick for park and ride at Dublin Airport. It's just 1.9 kilometers from the airport. This place offers a professional and reliable parking experience. It makes parking at the airport easier with several benefits:
Secure, monitored parking areas
Regular shuttle services to airport terminals
Cost-effective off-site airport parking rates
Convenient online booking options
Using park and ride services near Dublin Airport can make your travel less stressful. You can leave your car at a safe place and get shuttle rides to your terminal. This way, you can relax and enjoy your trip without worrying about parking.
When picking an off-site parking option, think about a few things:
How far it is from the airport
How often the shuttle runs
The cost
The security
There are many park and ride services at Dublin Airport. This gives you choices for your parking needs. Booking in advance is a good idea to get the best prices and ensure you have a spot during busy times.
Security Features and Safety Measures
Dublin Airport parking security is a top priority for travelers. We ensure your vehicle is safe with advanced technology and human solutions.
Parking facilities at Dublin Airport have multiple layers of protection. Our car park safety measures go beyond traditional security. This creates a secure environment for every traveler.
Advanced CCTV Surveillance
Our state-of-the-art security system includes extensive CCTV coverage. Key features of our surveillance include:
24-hour monitoring of parking zones
High-resolution cameras positioned strategically
Real-time recording and tracking
Immediate incident response capabilities
Round-the-Clock Staff Assistance
Vehicle safety also includes human support. Our dedicated staff provides continuous support through:
Continuous security patrols
Barrier entry and exit systems
Immediate assistance via intercoms
Trained personnel available 24/7
Travelers can rest assured that their vehicles are protected. Our robust Dublin Airport parking security infrastructure keeps your vehicle safe. From advanced technology to personal staff assistance, we prioritize your vehicle's safety.
Hotel Parking Options
Travelers looking for easy airport hotel parking at Dublin Airport have many choices. Dublin Airport hotel car parks offer flexible solutions for those who want to park and stay. This makes traveling smoother.
The airport offers several parking options near hotels. These meet different traveler needs:
Open Air Car Parking
Multi-story Car Parking at Crowne Plaza Dublin Airport
Underground Car Parking at Metro Hotel
Underground Car Parking at Clayton Hotel
Park and Fly options are getting more popular. They help travelers avoid the hassle of early morning drives. They also offer extra convenience.
Hotel
Parking Type
Key Features
Shuttle Service
Crowne Plaza
Multi-story
Secure, covered parking
Direct terminal shuttle
Metro Hotel
Underground
Climate-controlled parking
Complimentary airport transfer
Clayton Hotel
Underground
24/7 monitored parking
Frequent shuttle service
Booking airport hotel parking in advance can save money and ensure a spot. It's important to check the hotel's parking rules and shuttle times when planning.
Shuttle Services and Terminal Connections
Getting around Dublin Airport's parking spots is easy with the airport's shuttle services. These services link parking areas to terminals, making travel smooth for everyone. Whether you need a quick ride or a bit more time, there's a shuttle for you.
There are many shuttle options to choose from:
Express Red Long Term Parking gets you to both terminals in just 5 minutes
Holiday Blue Long Term Parking takes 15 minutes to reach the terminals
Shuttles run often, so you won't wait long
The shuttle services are made to save you time and make your trip better. Each stop is easy to find, in both parking lots and terminals. This makes it simple to get on the right shuttle.
Here are some great things about the shuttle services:
They're easy to get to, even if you have trouble walking
Help is available for your bags
They leave on schedule, so you know when to expect them
They're free for those who have booked parking
Expect reliable and quick Dublin Airport terminal connections. They make your journey smoother, cutting down on stress. You'll find it easier to move from parking to your flight.
Alternative Transportation Options
Visitors to Dublin Airport have many ways to get there besides parking. Looking into other options can cut costs and ease travel stress.
Public transport is a great choice for getting to the airport. Dublin Bus and Airlink Express offer reliable routes from the city center.
Dublin Bus Route 16: Direct city center connection
Airlink Express 747: Quick airport shuttle service
Aircoach: Private bus service with multiple pickup points
Taxis are another flexible way to get to Dublin Airport. Licensed taxis offer door-to-door service with clear prices.
Transportation Method
Average Cost
Travel Time
Dublin Bus
€7-€10
45-60 minutes
Airlink Express
€7-€12
30-40 minutes
Taxi
€25-€40
25-35 minutes
For those who care about the environment, biking or walking to the airport is an option. Some cycling paths lead right to the airport.
"Choosing the right transportation method can significantly impact your travel experience and budget." - Dublin Airport Transportation Authority
Rental cars are perfect for those who want freedom during their Dublin trip.
Conclusion
Getting to Dublin Airport parking can seem hard, but this guide makes it easy. You can find short-term, long-term, or premium parking. Knowing your options helps make your airport trip smooth.
Each terminal has its own parking setup to fit different travelers. Terminal 1 has easy drop-off spots, while Terminal 2 has lots of long-term parking. Booking early helps you get the best spot and save money.
At Dublin Airport, safety and easy access are key. There's CCTV, staff on duty 24/7, and special parking for those with mobility issues. Think about how long you'll be away, your budget, and what's most convenient for you.
Good airport parking starts with making smart choices. Use online booking, look at different parking options, and plan ahead. This way, your airport parking can be easy and stress-free.
FAQ
What parking options are available at Dublin Airport?
Dublin Airport has many parking choices. You can park short-term at Terminals 1 and 2. There's also long-term parking (Express Red and Holiday Blue) and Drop & Go services. Plus, there are spots for passengers with mobility issues.
How can I save money on airport parking?
Booking online early can save you money. Look for codes like SUMMER25 for up to 15% off. Compare long-term and park and ride services to find the best deal.
Are there accessible parking spaces at Dublin Airport?
Yes, there are over 90 accessible parking bays. They are in T1's Short Term Car Park B, T2's Short Term Car Park, and Express Red Long Term Car Park. These are for disabled parking permit holders.
What is the Drop & Go service?
Drop & Go is a premium service. Travelers can quickly hand over their keys. It's at both Terminal 1 and Terminal 2, saving time.
How long can I park at Dublin Airport?
Dublin Airport has short-term and long-term parking. Short-term is great for quick visits, starting at €3.00 for an hour. Long-term options like Express Red and Holiday Blue are for longer trips.
Is my vehicle secure while parked at Dublin Airport?
Yes, your vehicle is safe. Dublin Airport has 24/7 CCTV, security patrols, and barrier systems. There's also staff on site to help.
Are there shuttle services between parking areas and terminals?
Yes, there are shuttle services. Express Red Long Term parking has a 5-minute shuttle. Holiday Blue Long Term parking offers a 15-minute shuttle.
Can I book parking in advance?
Absolutely. Dublin Airport has an online booking system. Booking early can save you money and secure a spot during busy times.
Are there alternative transportation options to parking?
Yes, there are other ways to get to the airport. You can use public buses, taxis, rent a car, or try park and ride services like PARK2TRAVEL, just 1.9km from the airport.
What are the parking rates for short-term parking?
Short-term parking starts at €3.00 for the first hour. Each additional hour is €6.00, with a daily cap of €45.00. Always check online for the latest prices.
This is post #6 in our wedding series. You can get updated on post #1 {here}, post #2 {here}, post #3 {here}, post #4 {here}, post #5 {here}, post #6 {here}.
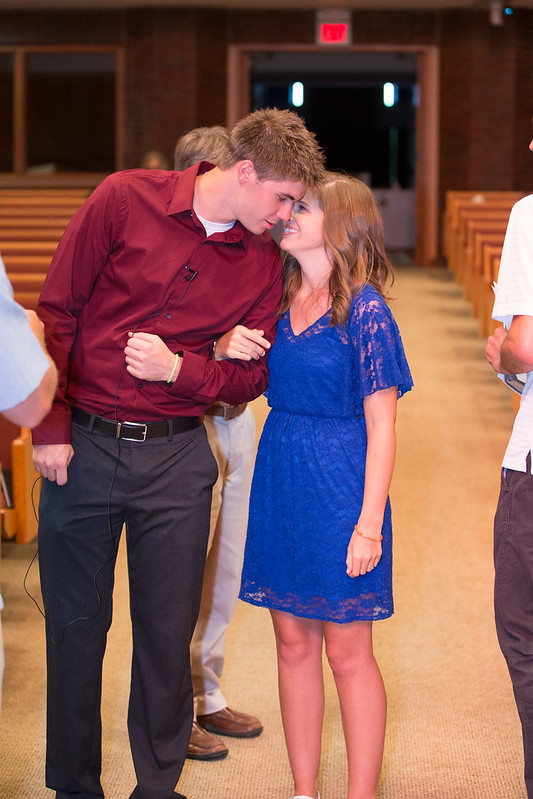
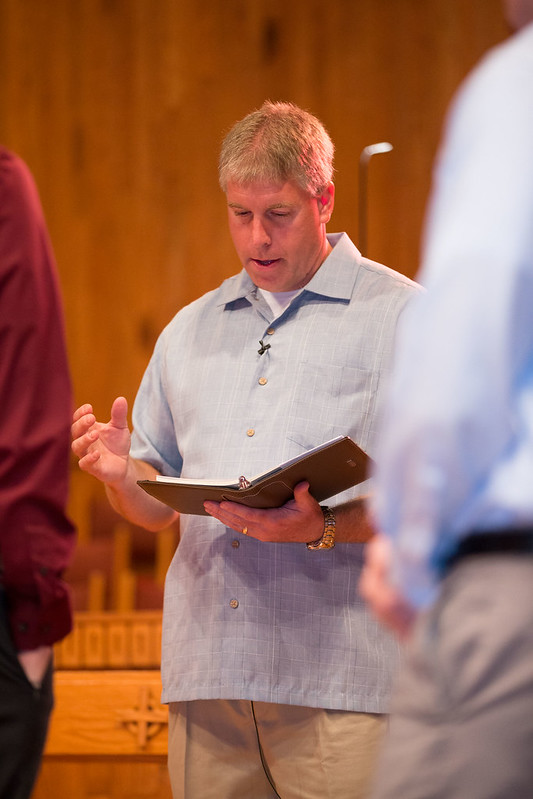
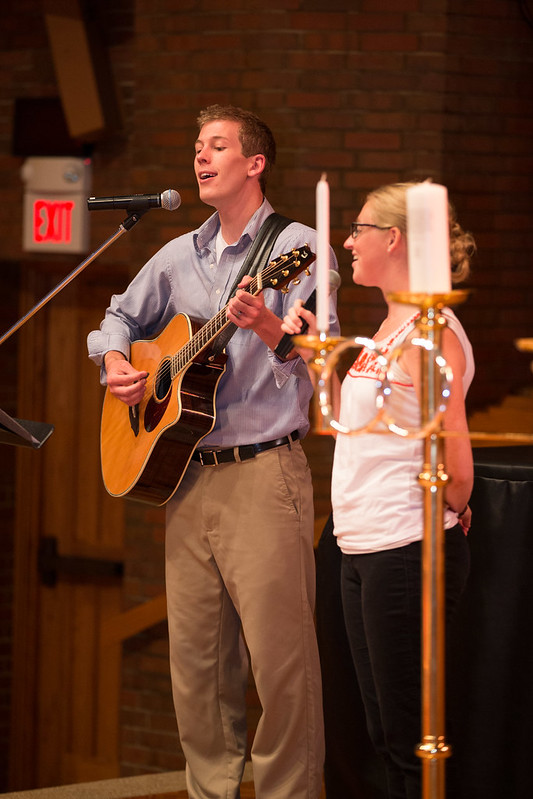
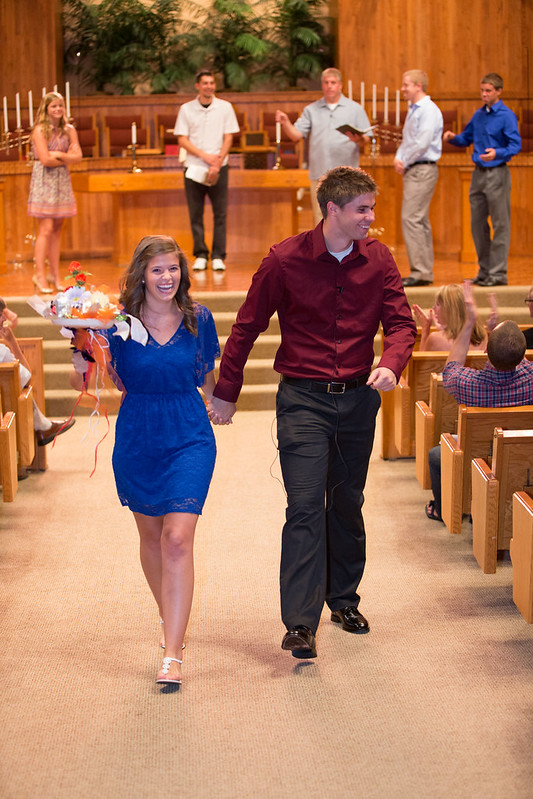
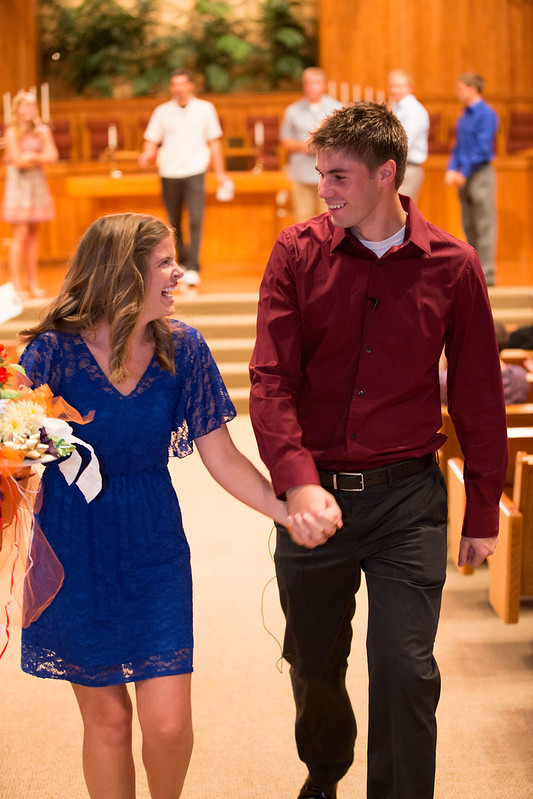
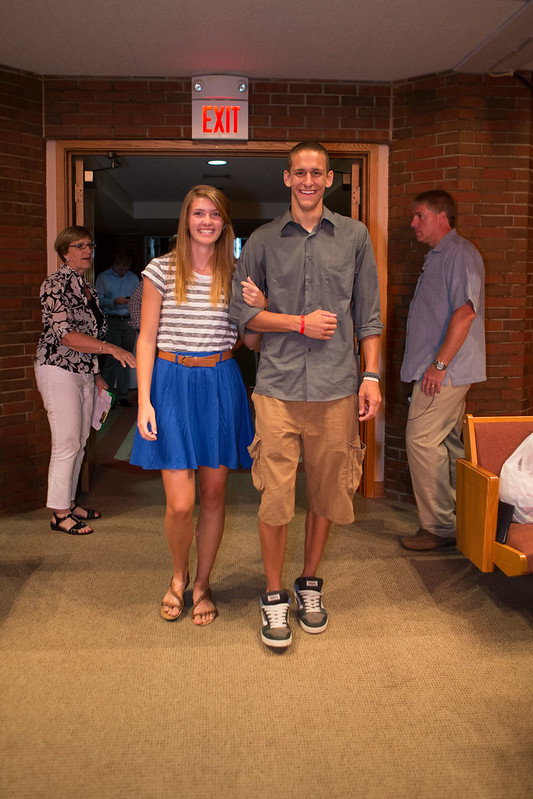
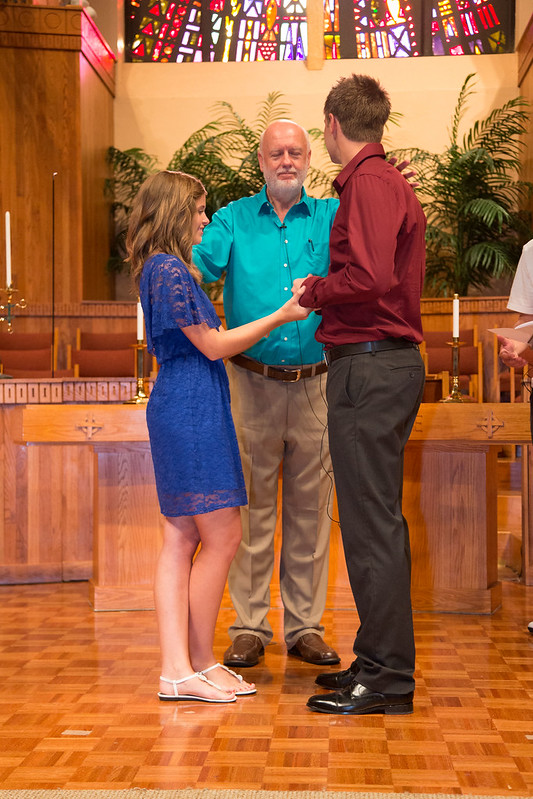
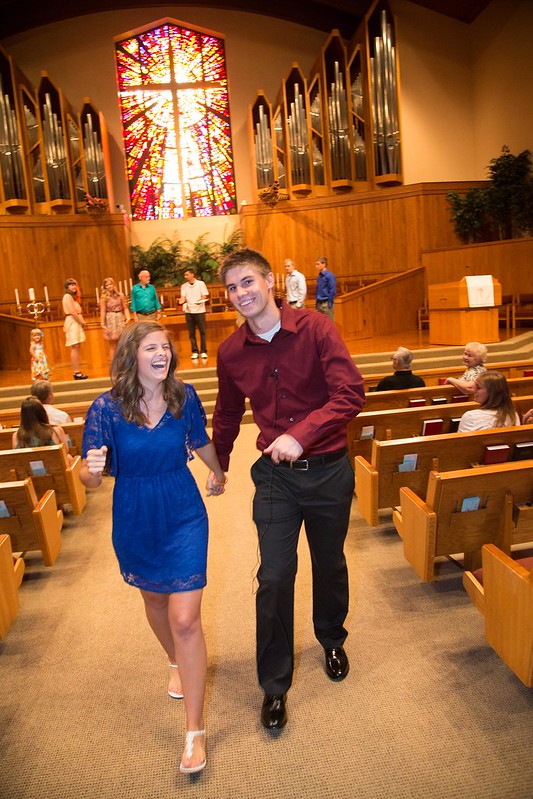
Our wedding rehearsal was so much fun. We had dinner and desserts at the clubhouse right by my parents house after the actual wedding rehearsal at the church. We had our best man, maid of honor, parents, and friends share their toasts after the rehearsal dinner instead of at the wedding. I loved doing it this way because the toasts seemed much more personal and there wasn’t a time constraint. I don’t have any photos from the dinner, but know that it was beautiful, wonderful, and Mike and I both felt so loved and supported.
Happy day! We come home from Pines this weekend!! I’m so excited to see Alf…
If you have any questions, feel free to leave a comment!
This is post #6 in our wedding series. You can get updated on post #1 {here}, post #2 {here}, post #3 {here}, post #4 {here}, post #5 {here}.
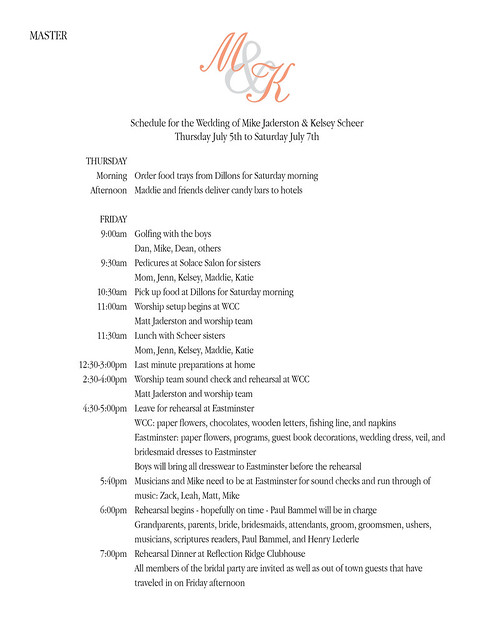
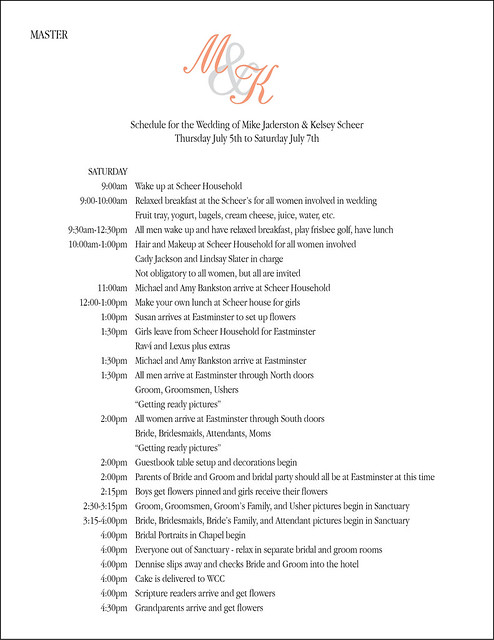
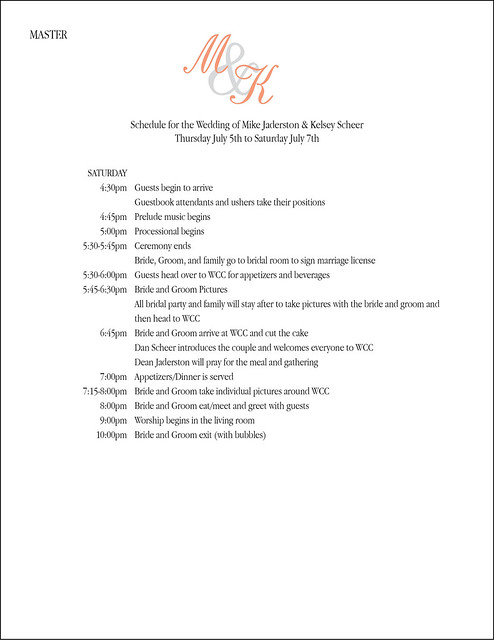
Alright, if you know me you may know that I am a planner. Yes, the typical type A all her ducks in a row planner. So, obviously my wedding scheduling was no different. I had a three page spread called the MASTER schedule.
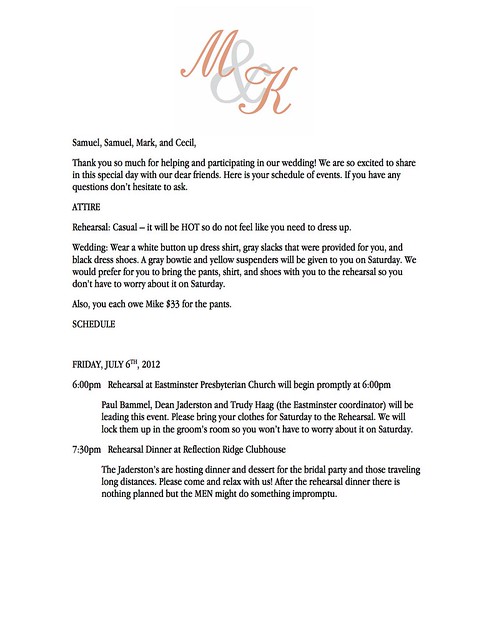
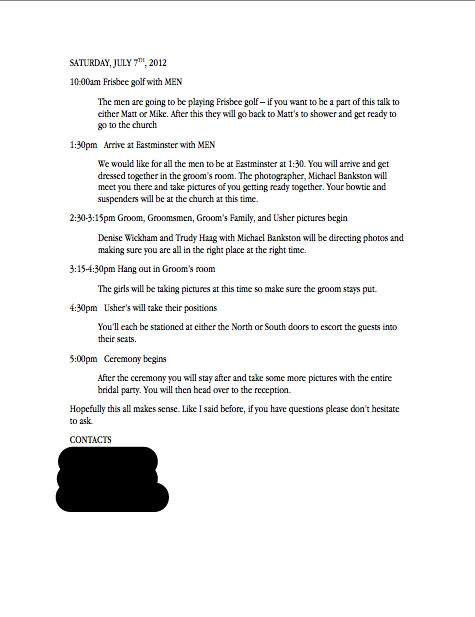
And the miraculous thing was that we actually stuck to the schedule (to my knowledge)! I also sent out individual schedules to each group of people. For example, the ushers all got these in the their inboxes…
Yes, I was a little crazy, but I felt so much better knowing that people at least had access to a schedule and that my phone wasn’t going to be ringing the day of the wedding answering scheduling questions. I also really enjoyed typing it all out beforehand. For whatever reason, seeing the entire three days all on paper made my nerves and stress decrease.
And that’s the scheduling of our wedding! It took a couple hours to write it all out, but so worth it in the long run not having to answer questions left and right. Happy day!
This is post #5 in our wedding series. You can get updated on post #1 {here}, post #2 {here}, post #3 {here}, post #4 {here}.
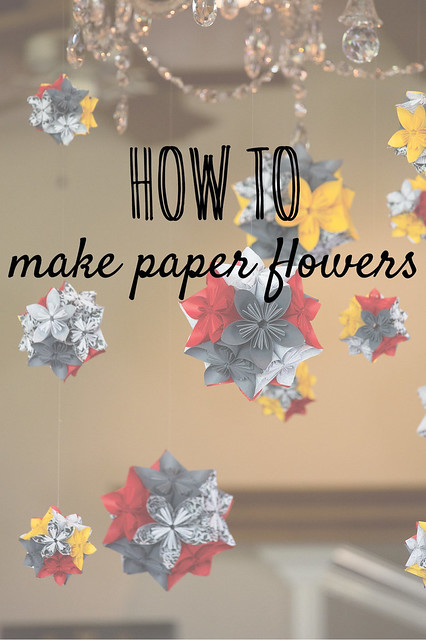
If you went to Mike and I’s wedding you know exactly what I’m talking about… well at least I hope you know. These little paper flowers were the main event! (besides the bride and groom and our families I suppose) They lined the aisle, they were on the tables in the reception hall, they hung above the cake, and they were even scattered in the food line. I loved them and I still love them to this day. I’m thinking someday we will have a christmas tree made out of them because we have boxes of them left over. I didn’t exactly think of what to do with them after the wedding.
We made 100s. We had all sizes and all shapes (all shapes being two shapes – half sphere and sphere).
They were perfect. Wanna know how to make them?
Lucky for you, my mom and I made every single one… As I said before, 100s of paper flowers were all over our venues. Good news is they aren’t hard to make and not even that time consuming if you only need a couple.
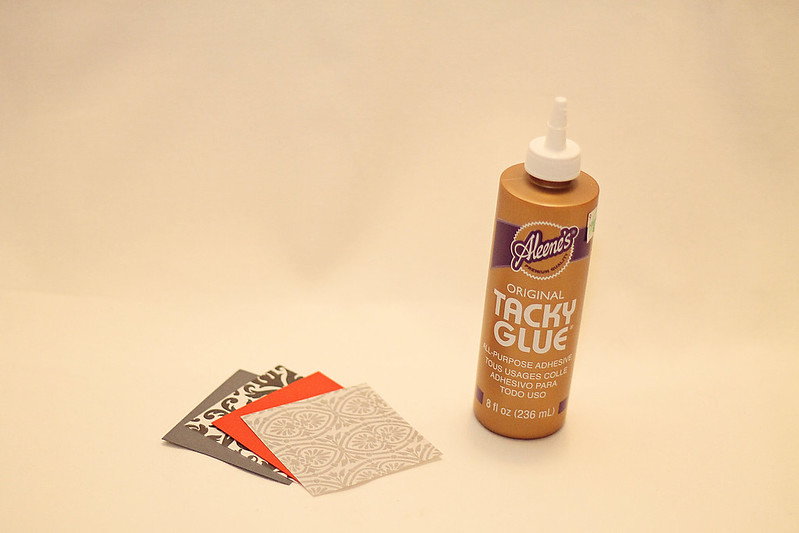
Things you need:
– Paper of choice (any size as long as it can be cut into squares)
– Glue (We used Tacky Glue but regular liquid glue will get the job done)
Optional:
– Clothespins (This made our process MUCH faster but not necessary if you’re only making a few)
Now for the mathematicians out there….
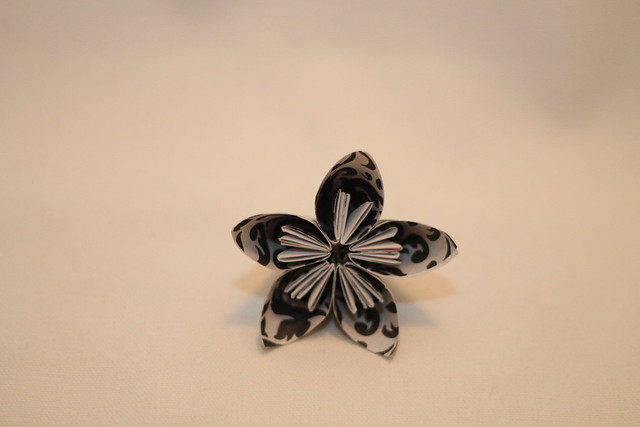
Each flower is made up of 5 squares.
Each sphere is made up of 12 flowers.
This means that you need (5 x 12) 60 squares in order to make (1) ONE flower ball.
Size can vary. I have made three sizes – 3″, 4″, and 6″.
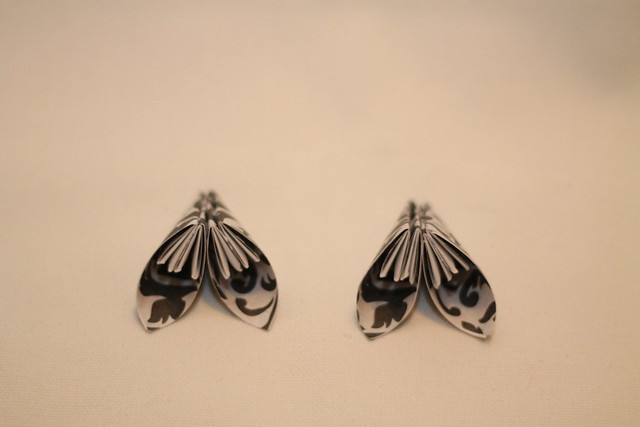
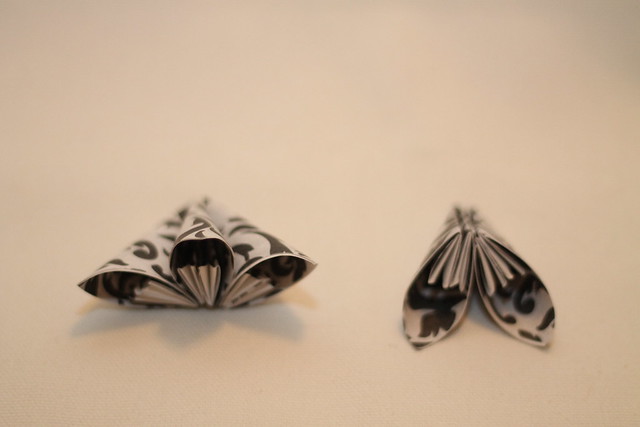
Left: 3″ half sphere || Right: 4″ half sphere Left: 3″ sphere || Middle: 4″ sphere || Right: 6″ sphere This last photo is the 3″ square compared to the 4″ square
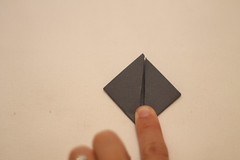
1st: Cut your paper to size. A paper cutter will help to get them perfect, but it is not necessary.
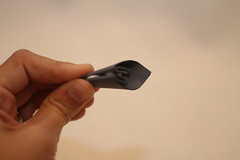
2nd: Fold your first pedal like so…
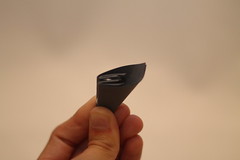
3rd: Glue each side of the pedal together. Be careful not to pinch the tip (unless you’re going for the pointed look).
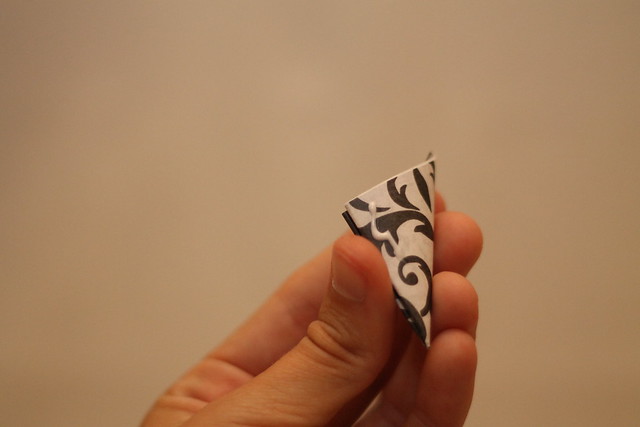
4th: Repeat step 2 until you have 60 pedals – 30 if you want a half sphere – 5 if you want one flower
5th: Once all pedals are made it is time to glue the flower together
6th: Once you have all flowers glued together you can continue gluing to make a sphere. This is the step where I would recommend clothespins. They help keep the flowers together so you can set them down and walk away or work on folding other flowers.
And you’re done! If you’re crazy like me and want to decorate your wedding with these beautiful colorful balls, repeat 347 times… and then figure out what to do with them when the weddings is over. Oh, and share your ideas with me!
Good news is – after all that flower making I have definitely mastered this craft. If anyone needs me to whip up a flower or two just let me know. I charge $10 per pedal…. Yes, that’s $600 per ball… Ha! But seriously, if you really want me to make you some flowers? Email me: kelsey {at} thejaderstons.com and we’ll talk.


 Left: 3″ half sphere || Right: 4″ half sphere
 Left: 3″ sphere || Middle: 4″ sphere || Right: 6″ sphere
 This last photo is the 3″ square compared to the 4″ square